Mastering Valve Lash in 10 Simple Steps
Valve lash is an important aspect of engine maintenance that can greatly impact the performance and longevity of your vehicle. It refers to the clearance between the valve stem and the rocker arm or camshaft that opens and closes the valve. If the valve lash is not properly adjusted, it can lead to poor engine performance, increased fuel consumption, and even engine damage. In this blog post, we will guide you through the process of mastering valve lash in 10 simple steps.
Step 1: Understand the Importance of Valve Lash
Before diving into the adjustment process, it's crucial to understand why valve lash matters. Proper valve lash ensures that the valves open and close at the correct time, allowing for optimal fuel combustion and power output. It also prevents excessive wear on the valve train components.
Step 2: Gather the Necessary Tools
To adjust valve lash, you will need a few basic tools, including a feeler gauge, a wrench or socket set, and a valve cover gasket. Make sure you have all the required tools before starting the adjustment process.
Step 3: Locate the Valve Lash Adjustment Points
Consult your vehicle's service manual to locate the valve lash adjustment points. These are typically found on the rocker arms or camshaft, depending on the engine design. Familiarize yourself with the location before proceeding.
Step 4: Prepare the Engine
Prior to adjusting the valve lash, ensure that the engine is turned off and cool. Remove the valve cover to gain access to the valve train components. It may be necessary to remove other components, such as the air cleaner or intake manifold, depending on the engine design.
Step 5: Determine the Correct Valve Lash Specifications
Refer to your vehicle's service manual or consult the manufacturer's specifications to determine the correct valve lash for your engine. Valve lash specifications can vary depending on the engine type and design.
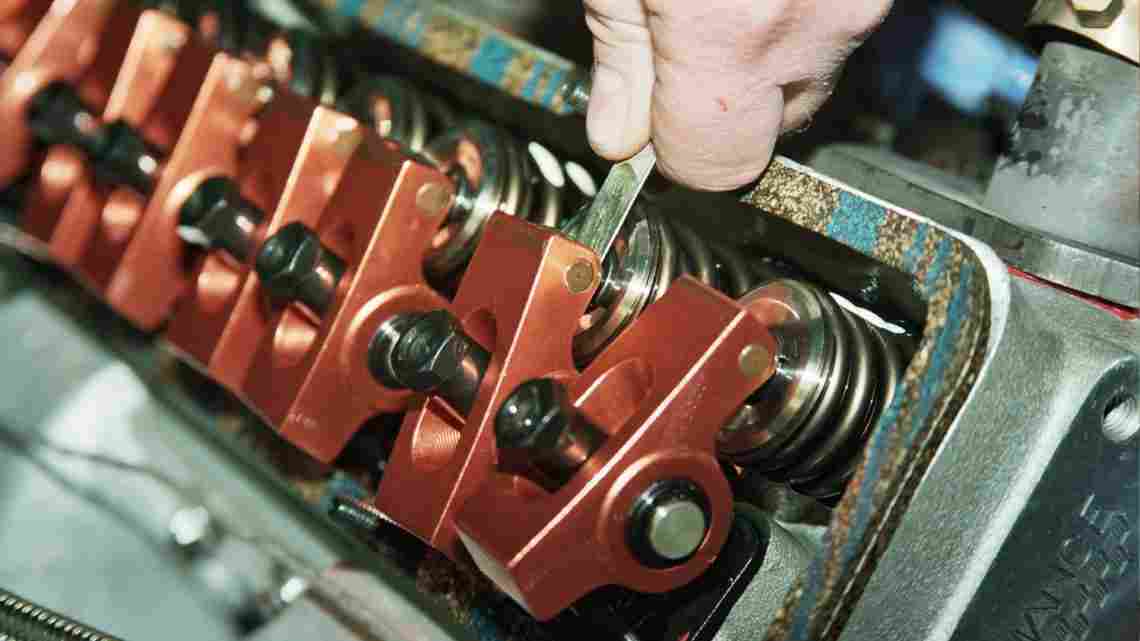
Step 6: Adjust the Valve Lash
Using the feeler gauge, measure the clearance between the valve stem and the rocker arm or camshaft. If the clearance is too tight or too loose, use the wrench or socket set to adjust the valve lash to the correct specification. Repeat this process for each valve.
Step 7: Double-Check the Valve Lash
After adjusting the valve lash, double-check the clearance using the feeler gauge. Ensure that the clearance is within the specified range. If necessary, make further adjustments until the correct valve lash is achieved.
Step 8: Reinstall the Valve Cover
Once the valve lash is properly adjusted, reinstall the valve cover using a new gasket. Tighten the bolts or screws to the manufacturer's recommended torque specification.
Step 9: Start the Engine and Listen for Proper Operation
Start the engine and listen for any abnormal noises or vibrations. Properly adjusted valve lash should result in smooth engine operation. If you notice any issues, recheck the valve lash and make adjustments as needed.
Step 10: Regularly Maintain Valve Lash
Valve lash can change over time due to wear and thermal expansion. It is important to regularly check and adjust the valve lash according to the manufacturer's recommended maintenance schedule. This will help ensure optimal engine performance and longevity.
By following these 10 simple steps, you can master valve lash adjustment and keep your engine running smoothly. Remember to always consult your vehicle's service manual and follow the manufacturer's recommendations for valve lash specifications and maintenance intervals. Proper valve lash adjustment is a critical aspect of engine maintenance that should not be overlooked.